In the last two posts I covered the basics and creating a Windows To Go drive, and today it’s time to discuss creating multiple images at the same time through PowerShell. The best option here is to use a USB 3.0 hub unless your PC has USB 3.0 ports a plenty. Writing to multiple Windows To Go certified drives simultaneously won’t stress a single USB 3.0 connection being shared by a USB 3.0 hub, so you don’t have concerns on that side.
The following scripts were provided on TechNet, so I definitely can’t take credit for them. You need to start by PowerShell as an administrator, and run the following script to prepare the USB drive for Windows To Go.
#The following command will set $Disk to all USB drives with >20 GB of storage
$Disk = Get-Disk | Where-Object {$_.Path -match “USBSTOR” -and $_.Size -gt 20Gb -and -not $_.IsBoot }
#Clear the disk. This will delete any data on the disk. (and will fail if the disk is not yet initialized. If that happens, simply continue with ‘New-Partition…) Validate that this is the correct disk that you want to completely erase.
#
# To skip the confirmation prompt, append –confirm:$False
Clear-Disk –InputObject $Disk[0] -RemoveData
# This command initializes a new MBR disk
Initialize-Disk –InputObject $Disk[0] -PartitionStyle MBR
# This command creates a 350 MB system partition
$SystemPartition = New-Partition –InputObject $Disk[0] -Size (350MB) -IsActive
# This formats the volume with a FAT32 Filesystem
# To skip the confirmation dialog, append –Confirm:$False
Format-Volume -NewFileSystemLabel “UFD-System” -FileSystem FAT32 `-Partition $SystemPartition
# This command creates the Windows volume using the maximum space available on the drive. The Windows To Go drive should not be used for other file storage.
$OSPartition = New-Partition –InputObject $Disk[0] -UseMaximumSize
Format-Volume -NewFileSystemLabel “UFD-Windows” -FileSystem NTFS -Partition $OSPartition
# This command assigns drive letters to the new drive, the drive letters chosen should not already be in use.
Set-Partition -InputObject $SystemPartition -NewDriveLetter “S”
Set-Partition -InputObject $OSPartition -NewDriveLetter “W”
# This command toggles the NODEFAULTDRIVELETTER flag on the partition which prevents drive letters being assigned to either partition when inserted into a different machine.
Set-Partition -InputObject $OSPartition -NoDefaultDriveLetter $TRUE
Next up, we can use DISM to apply your WIM to the USB drive.
dism /apply-image /imagefile:n:imagefolderdeploymentimagesmywtgimage.WIM /index:1 /applydir
Next up is just using bcdboot to prepare the system partition.
W:WindowsSystem32bcdboot W:Windows /f ALL /s S:
Next up we need to create the necessary policy to keep internal disks offline.
<?xml version=’1.0′ encoding=’utf-8′ standalone=’yes’?>
<unattend xmlns=”urn:schemas-microsoft-com:unattend”>
<settings pass=”offlineServicing”>
<component
xmlns:wcm=”http://schemas.microsoft.com/WMIConfig/2002/State”
xmlns:xsi=”http://www.w3.org/2001/XMLSchema-instance”
language=”neutral”
name=”Microsoft-Windows-PartitionManager”
processorArchitecture=”x86″
publicKeyToken=”31bf3856ad364e35″
versionScope=”nonSxS”
>
<SanPolicy>4</SanPolicy>
</component>
<component
xmlns:wcm=”http://schemas.microsoft.com/WMIConfig/2002/State”
xmlns:xsi=”http://www.w3.org/2001/XMLSchema-instance”
language=”neutral”
name=”Microsoft-Windows-PartitionManager”
processorArchitecture=”amd64″
publicKeyToken=”31bf3856ad364e35″
versionScope=”nonSxS”
>
<SanPolicy>4</SanPolicy>
</component>
</settings>
</unattend>
Next up we apply the above policy which we save as san_policy.xml to the Windows To Go drive
Dism.exe /Image:W: /Apply-Unattend:W:san_policy.xml
As previously mentioned, the Windows Recovery Environment is problematic with Windows To Go from a disk space perspective, so the general recommendation is to disable it.
<?xml version=”1.0″ encoding=”utf-8″?>
<unattend xmlns=”urn:schemas-microsoft-com:unattend”>
<settings pass=”oobeSystem”>
<component name=”Microsoft-Windows-WinRE-RecoveryAgent”
processorArchitecture=”x86″
publicKeyToken=”31bf3856ad364e35″ language=”neutral”
versionScope=”nonSxS”
xmlns:wcm=”http://schemas.microsoft.com/WMIConfig/2002/State”
xmlns:xsi=”http://www.w3.org/2001/XMLSchema-instance”>
<UninstallWindowsRE>true</UninstallWindowsRE>
</component>
<component name=”Microsoft-Windows-WinRE-RecoveryAgent”
processorArchitecture=”amd64″
publicKeyToken=”31bf3856ad364e35″ language=”neutral”
versionScope=”nonSxS”
xmlns:wcm=”http://schemas.microsoft.com/WMIConfig/2002/State”
xmlns:xsi=”http://www.w3.org/2001/XMLSchema-instance”>
<UninstallWindowsRE>true</UninstallWindowsRE>
</component>
</settings>
</unattend>
Save this as unattend.xml in the sysprep folder on the Windows To Go Drive.
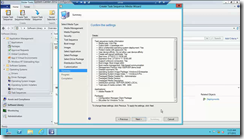
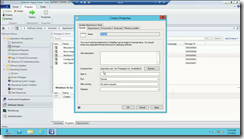
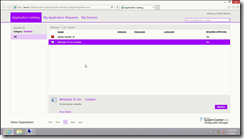
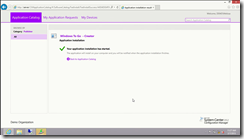
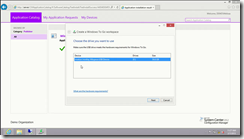
You can also deploy Windows To Go via System Center 2012 Configuration Manager, I’ve included a few screenshots that will walk you through that process as well. Obviously this makes more sense if you have SCCM deployed already.

