Microsoft has had some information on using MDT 2010 to build operating systems with the Windows Intune client installed already, but I thought it was worth taking a look at the process in MDT 2012 RC, and an approach for partners who may need to build images for several of their clients.
Two of the critical things to remember when deploying the Windows Intune client to new computers is that it needs internet connectivity to complete the installation. If you want to keep your build environment isolated from your production network, take a look at some of my previous posts on Threat Management Gateway as a potential solution which also offers other benefits.
The second critical thing to remember is that you can’t deploy the Windows Intune client and then run sysprep prepare for an image capture, as the machine will have already registered itself with the Windows Intune service.
Here’s a step by step guide to adding Windows Intune to your MDT 2012 RC environment.if you need to create an image for capture which includes the Windows Intune setup files and runs them after the Windows Out of Box Experience (OOBE), stay tuned, I’ll cover that in an upcoming post.
What I’ve done here is created three separate folders, each with the Windows_Intune_Setup.exe and WindowsIntune.accountcert file for three different fictitious companies I need to deploy Windows 7 to.
As we drill into the Contoso folder, you see the files for Contoso including their unique certificate.
If you right mouse click on Applications, you will see the New Application shortcut. Click this to add Contoso’s Windows Intune install to MDT 2012.
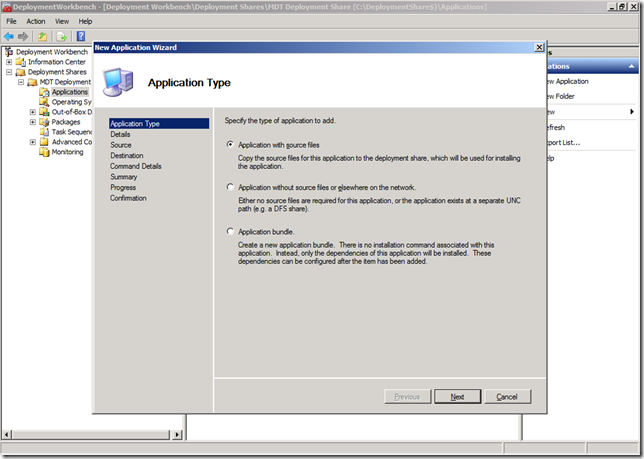
Here we choose Application with source files.
Now we can populate the details. Technically this is not the V2 client, but using a naming scheme that is consistent and easy to recognize for ease of updating in the future if Microsoft releases a new install package.
Here I have selected the Contoso folder for the source files.
We can change this folder name if we like, or alternatively you could follow a folder structure such as WindowsIntuneClientIntune Client 1 etc to prevent the root applications folder from getting too cluttered.
Running the Windows_Intune_setup.exe with the /quiet command ensures it runs in an unattended manner.
You can quickly review the summary to ensure that everything matches your goals.
And finally we can see the progress and save the output for documentation purposes.
Next up we need to add a command to a Task Sequence to install the client, which we can do by going to the properties of the Contoso Task Sequence I had created earlier.
At first you are presented with the General tab, but it’s the Task Sequence tab that we need.
On the Task Sequence tab, we choose install a single application.
We can then select the Contoso Intune client option and hit ok.
And then we can hit OK and we are ready to go!


