In the first post in this series I explained the reasons behind the alternate approach I’m taking to adding Microsoft Defender Advanced Threat Protection (MDATP) into a Microsoft 365 Business Premium (M365BP) tenant, and went through my preferred approach to setting up a new tenant. In this post we switch over to the Azure Portal to set up Azure Security Center as our gateway into the world of MDATP.
I’ve added an Azure subscription to this tenant in order to perform the following steps. You can use whatever type of subscription you have access to that supports chargeable Azure services for these steps
Step 1: Set Up Azure Security Center
You add Azure Security Center (ASC) to your Azure tenant by choosing add a resource and then choosing Azure Security Center. In this case it’s a single subscription in the tenant, but if this tenant had multiple subscriptions I could pick and choose which ones you want to protect. Click on Upgrade to enable Standard protection.

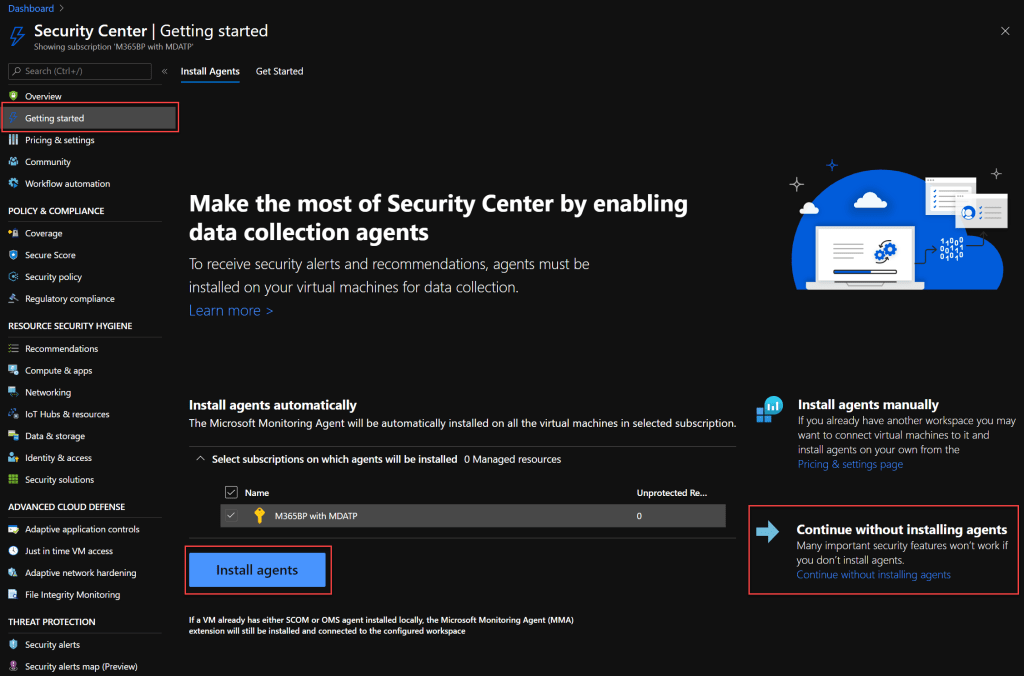
Because this is a new tenant and a new subscription, there aren’t any resource to protect just yet, but we add a virtual machine to trigger the provisioning of MDATP later. Choose Install agents to automatically install the Microsoft Monitoring Agent to any virtual machines we provision.
Now you can see that we have Standard pricing tier enabled under Pricing & Settings.
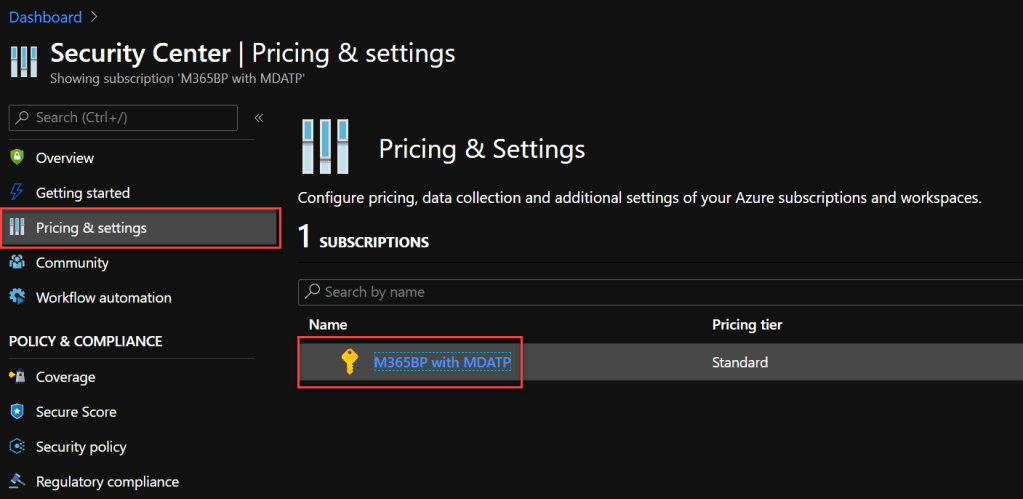
If you aren’t familiar with Azure Security Center functionality, the Pricing tier page introduces these at a top level, but the only one we are really going to focus on is Threat protection for Azure VMs and non-Azure servers (including Serer EDR), which is provided via MDATP. At a bare minimum you want to enable Standard tier on Virtual machines.

Moving down to Data Collection, you can see that Auto Provisioning is enabled, and we either allow the automatic creation of a Log Analytics workspace or if you want to create your own. In this example I’ll let it make the decisions, but in a production environment you would want to set it up in advance in order to meet your own naming and other governance requirements.
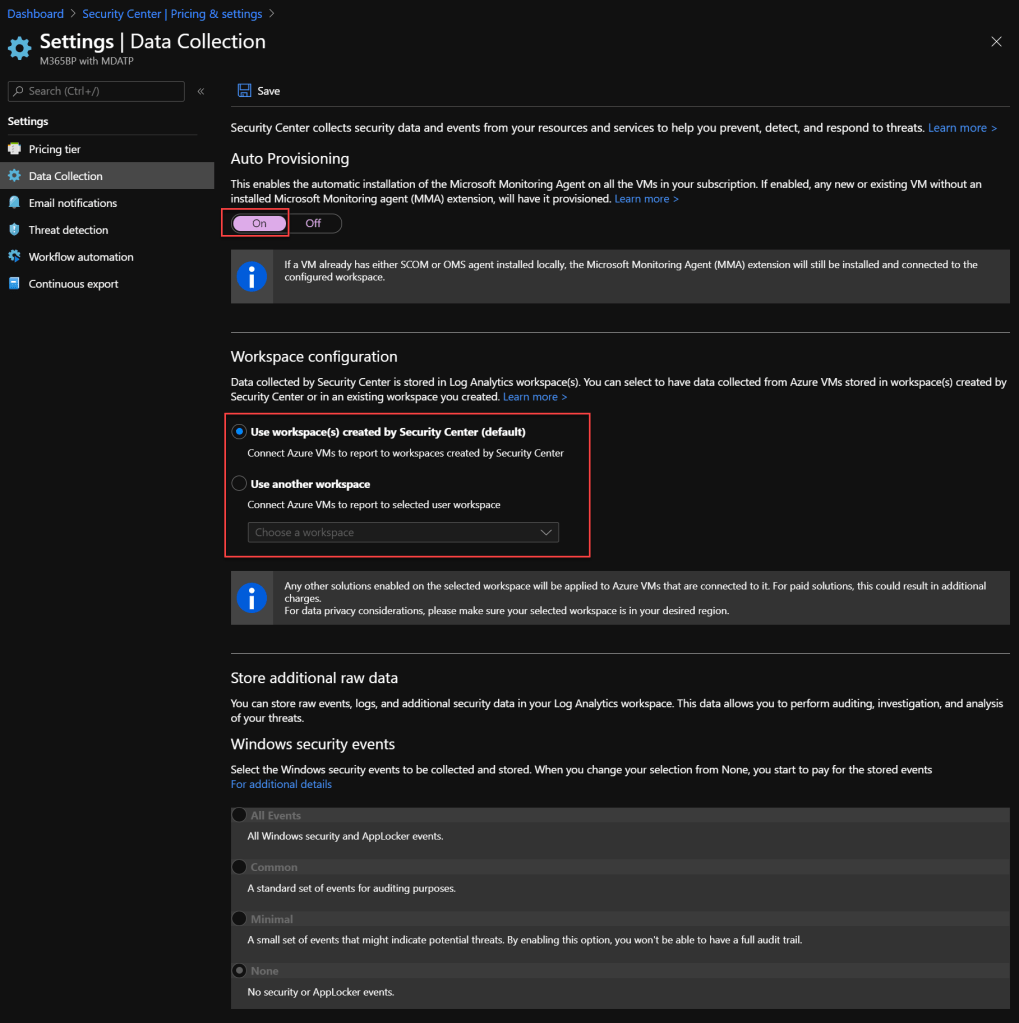
Next we move down to Threat protection, and you can start to see more of the Microsoft 365 integration pieces, with MDATP and MCAS, but remember, MCAS isn’t included here, just MDATP.

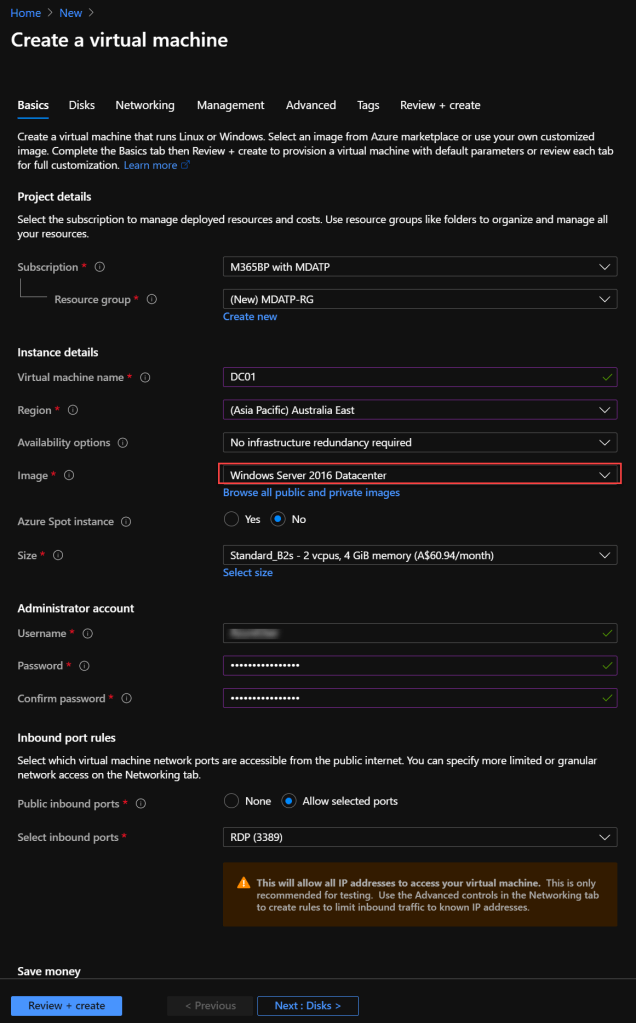
Step 2: Set Up A Windows Server 2016 Virtual Machine
While I would prefer to be deploying a Windows Server 2019 virtual machine here, but automatic onboarding isn’t supported here for Windows Server 2019, and I’m really just using this VM to trigger MDATP setup, not to actually be used yet. With that, choose Windows Server 2016 Datacenter in the Azure Marketplace or through your preferred scripting option.

There’s nothing special about the VM configuration, apart from Windows Server Datacenter 2016 instead of 2019. I’ve kept the VM size small to keep costs down.
Skipping ahead to Management, notice the green tick advising that Your subscription is protected by Azure Security Center standard plan. I’ve also chosen to collect both the Boot diagnostics and the OS guest diagnostics.

We then create the VM, and after the initial creation we won’t see anything that really indicates that Azure Security Center is doing anything.
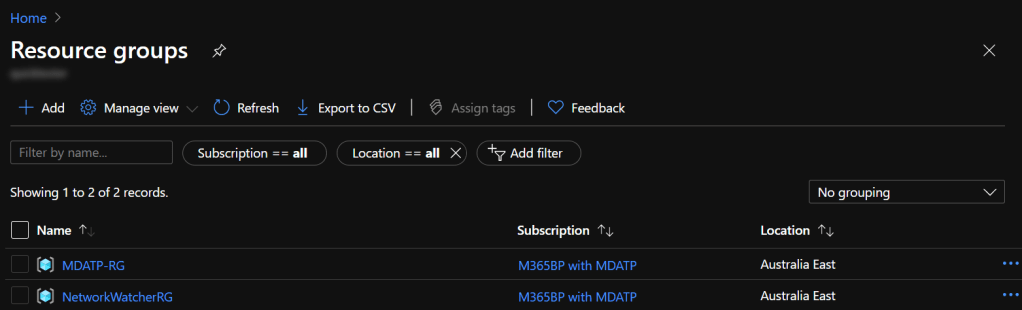
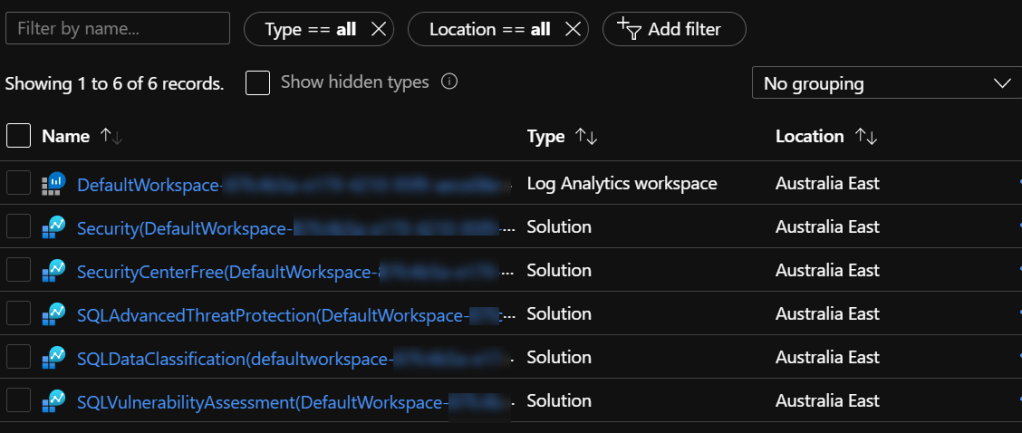
But within a short time frame, you will see a new Resource Group has been created in the region you deployed the VM, named DefaultResourceGroup-XXX, where XXX is the region. If you set up Log Analytics independently you shouldn’t see this change.

Here’s where we need to play a waiting game. The new Resource Group won’t have any resources, and it can take quite a while for the resources to be provisioned.

As I’m currently waiting for these resources to be provisioned in the new tenant, I’m cheating with the screenshot below (think if it as the “here’s one prepared earlier” that we’ve all seen on a television cooking segment). It’s actually from another tenant that has been running longer. I won’t switch tenants at this point, but rather just highlighting that we need to wait for this to be populated before we go any further.