This post combines a few of the different Office 365 deployment options that have been added via config.office.com with some changes that have been introduced to Intune, the primary impact of which is being able to use XML data in Intune to natively deploy Office 365 Business rather than deploying Office 365 Pro Plus before and allowing it to be converted automatically to Office 365 Business. The second option I’ll throw into the mix is the ease with which we can now use this same XML functionality to deploy Office insider builds, but I’ll touch on that later.

The first thing we need to do is head on over to https://config.office.com and what you’ll notice if you haven’t checked on it since the preview is that you can now sign in if you want to do more than create a new configuration or import and modify an existing configuration. This primarily means that we could sign in to access the Office cloud policy service, which I won’t cover here as it doesn’t apply to Office 365 Business based installations, only to Office 365 ProPlus.

Let’s work our way through some of the selections I’ve made…
- 32-bit deployment of Office – yes, I know this goes against the general recommendation from the Office team, but if we are going in to an unknown environment, 32-bit Office deployments are a safer bet. So far I haven’t met too many partners who service SMB customers and aggressively target them with 32-bit, but I think the 64-bit shift is already happening.
- Yes, in the Office Customization Tool we can chooes Business, which means we don’t need to wait for a licensing check based in place conversion from ProPlus to Business. I don’t really see the conversion approach to be an issue, but this should calm the nerves with those who are impatient.
- I’ve disabled Skype for Business deployments, because new Microsoft 365 Business tenants will mostly get Teams by default, which is a good thing.
- Teams is now available as an option, which means we can stop using Win32 or MSI based deployments of Teams from Intune.
- I’ll start with Monthly Channel, as that matches how Microsoft 365 Business deploys Office 365 Business.
- There’s no 6 in the diagram, but you probably want to make sure that options such as Autoactivation etc are set to ensure the user sees as few prompts as possible during install.

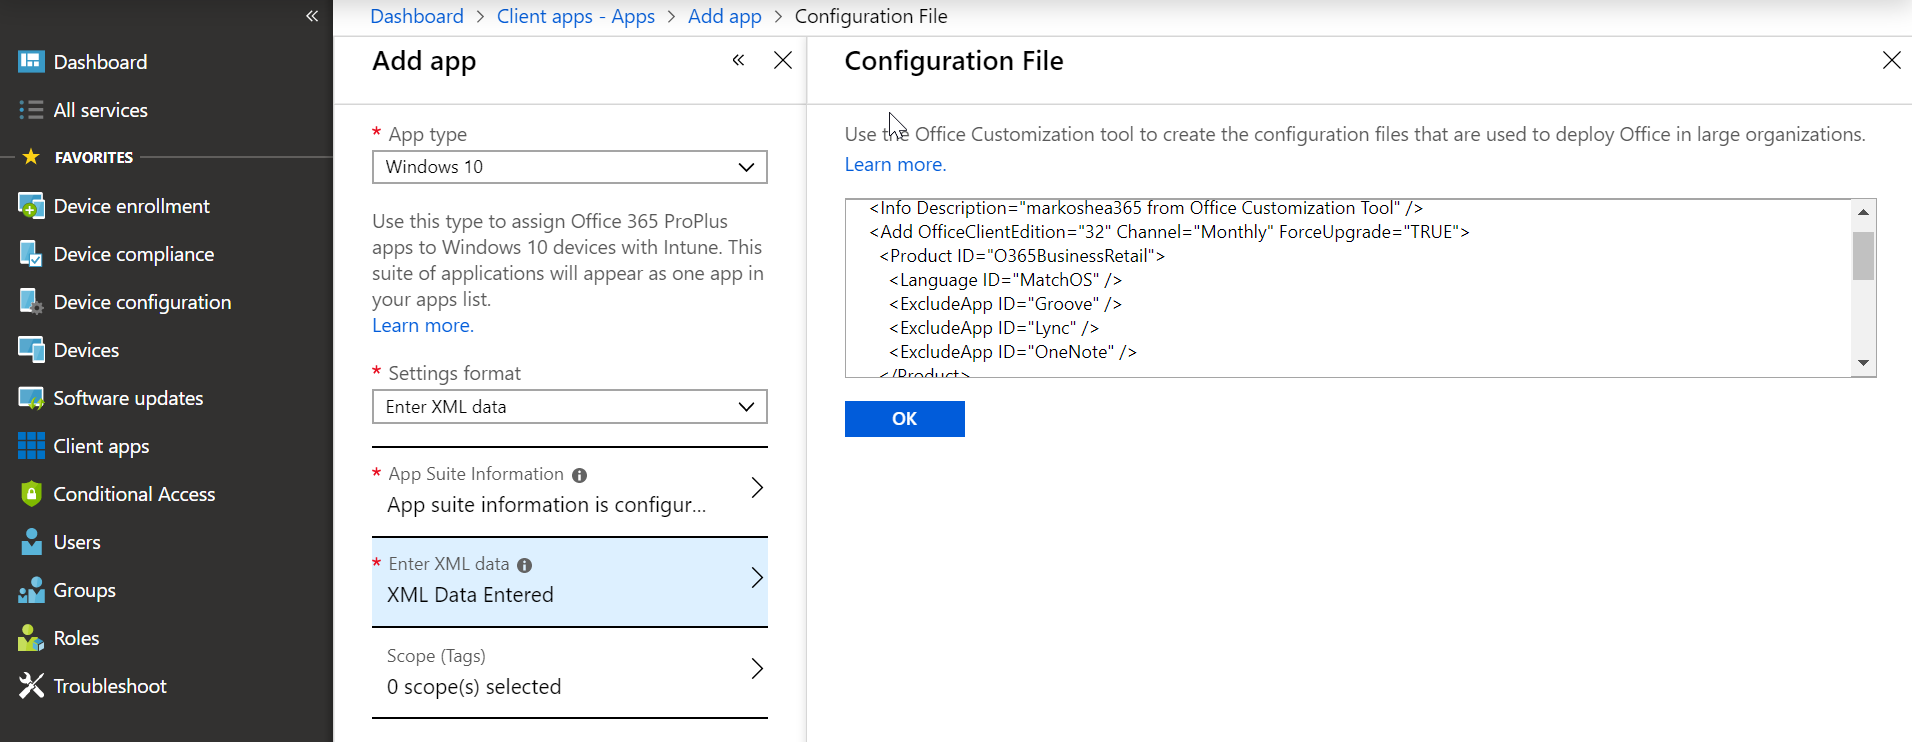
<Configuration ID="xxxxxxxx-xxxx-xxxx-xxxx-xxxxxxxxxxxxx">
  <Info Description="markoshea365 from Office Customization Tool" />
  <Add OfficeClientEdition="32" Channel="Monthly" ForceUpgrade="TRUE">
    <Product ID="O365BusinessRetail">
      <Language ID="MatchOS" />
      <ExcludeApp ID="Groove" />
      <ExcludeApp ID="Lync" />
      <ExcludeApp ID="OneNote" />
    </Product>
  </Add>
  <Property Name="SharedComputerLicensing" Value="0" />
  <Property Name="PinIconsToTaskbar" Value="TRUE" />
  <Property Name="SCLCacheOverride" Value="0" />
  <Updates Enabled="TRUE" />
  <RemoveMSI />
  <AppSettings>
    <Setup Name="Company" Value="markoshea365" />
  </AppSettings>
</Configuration>
Now that we have the XML data, we can jump over to Intune.
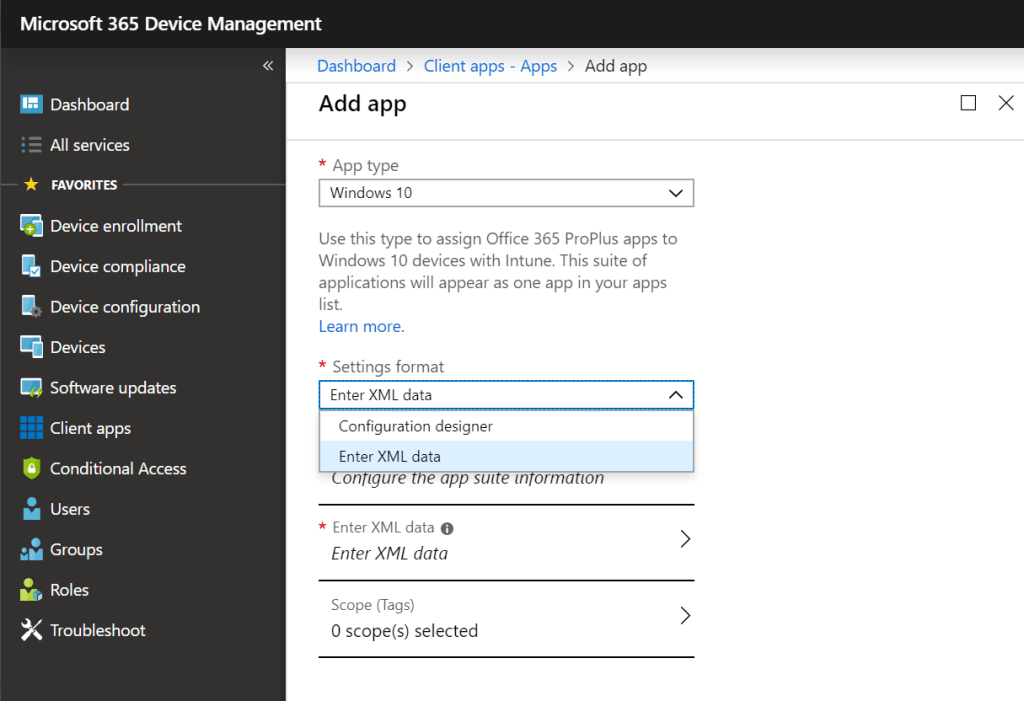
I’ve signed in to https://devicemanagement.microsoft.com and what we can do here is choose to enter the XML data rather than using the configuration designer option.

We still need to provide the app suite information to be able to easily identify the configuration or to add the app to the company portal, but I’ll keep this fairly bare bones for now.
Here’s the new, exciting part – being able to past the XML data right in. After this I just assign the configuration to a targeted user.
For the next part, I’ve gone back to the Office Configuration Tool and changed one thing, which is I’ve changed the channel to Monthly (Targeted), and once this is exported we see that is shows up as Insiders. I’ve pasted the two important lines in, just as a reminder that we are working with Office 365 Business and the Monthly (Targeted)/Insiders channel.
<Add OfficeClientEdition="32" Channel="Insiders" ForceUpgrade="TRUE">
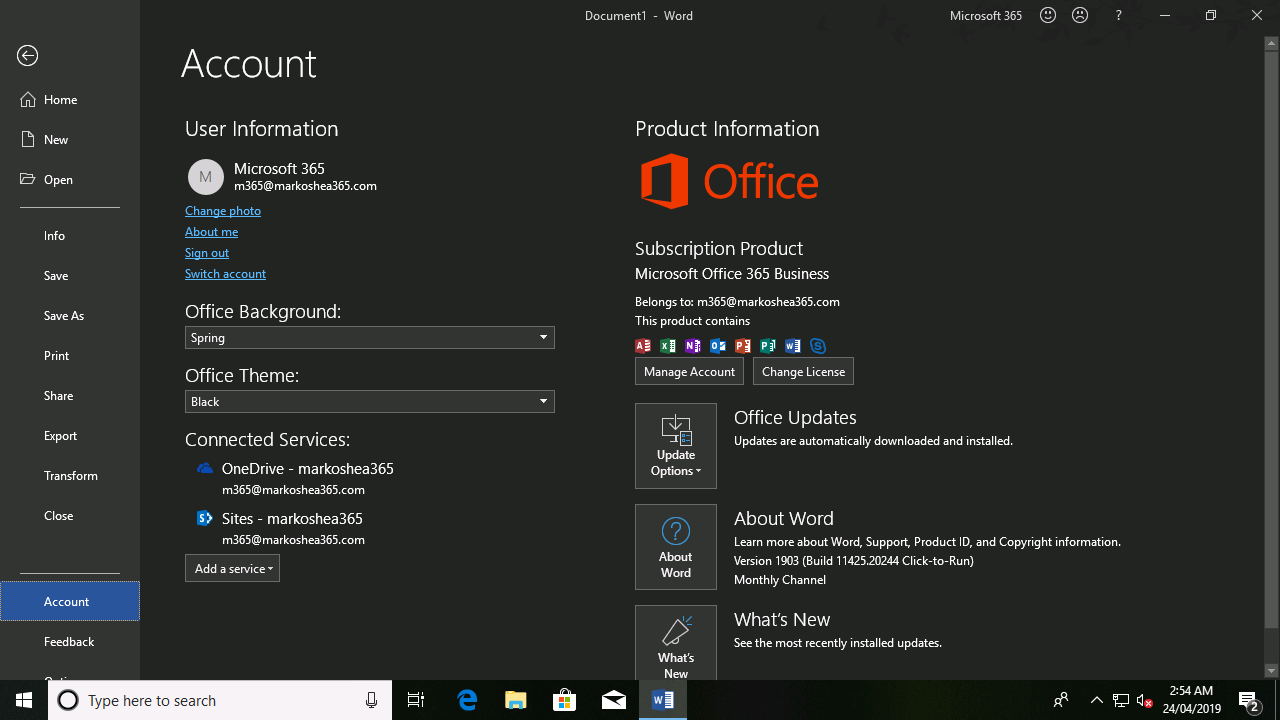
<Product ID="O365BusinessRetail">Back in Intune I’ve just replaced the existing XML so that I can deploy Office as Monthly (Targeted). The end result of that deployment is what you see below.
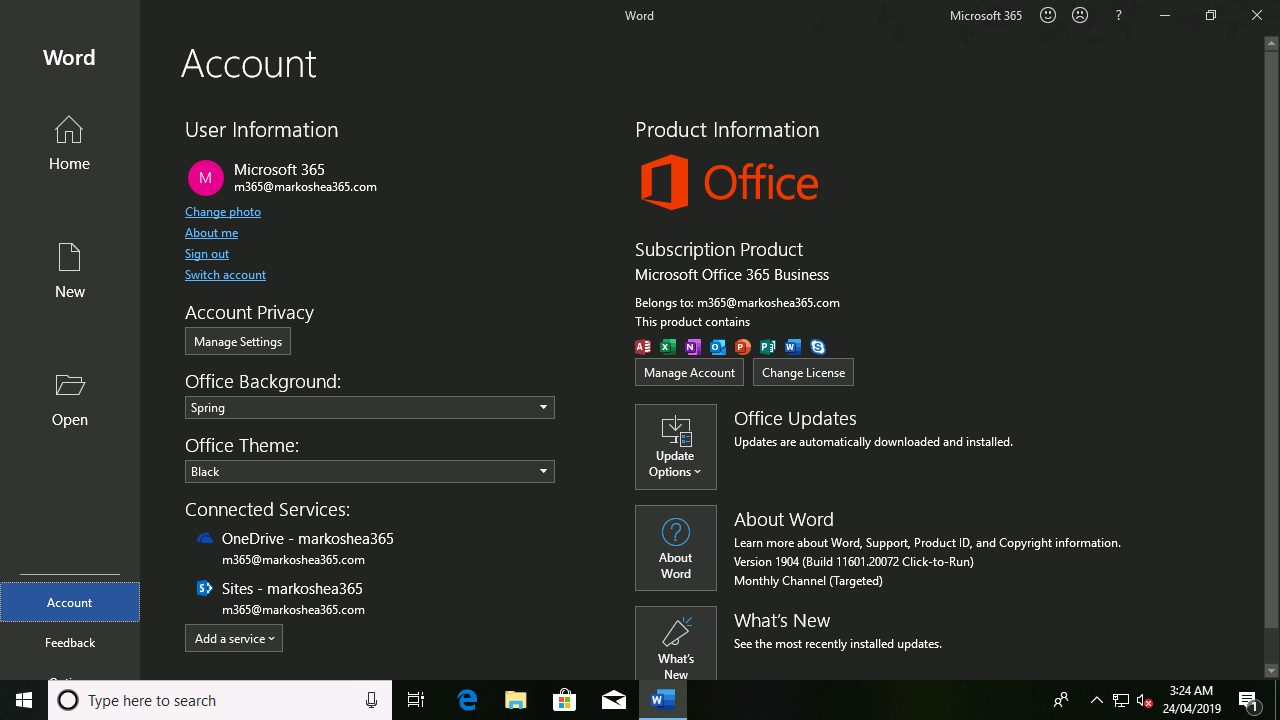
The main thing to call out here is that the version is 1904 vs. 1903, and you’ll also see that it shows Monthly Channel (Targeted). The thing that really starts to change now with the XML based configurations is that if we want to move out of Monthly (Targeted)/Insider to Insider Fast, all we have to do is update the XML data in Intune. Where do we get this from? Say hello to
https://insider.office.com/en-us/handbook/for-work-or-school which has the specific details we need. I’ll use the sample XML from this page, but will just change the ProductID to O365BusinessRetail

The reason I went through the extra steps of showing you the Offie Insider option was that I usually try to keep all of my test devices on the latest Windows Insider and Office Insider Builds. Deployment via ODT was one method I had used previously on devices to get Office Insider Fast, but I had to then make sure I was excluding those devices from being managed by Intune’s native Office capabilities because they would end up moving back and forth between rings when an update check occurred. This solves this issue, as well as what the original intent of this post was designed for, to allow the immediate deployment of Office 365 Business from Intune, rather than deploying ProPlus and waiting for a licensing check based conversion.
