In Australia we got to have two Australia Day’s this year, the first on Saturday for the real Australia Day, and yesterday (Monday) for the second time in the Australian tradition of taking an extra day off when a holiday falls on a weekend. A large chunk of the east coast of Australia was hit by heavy rain, thankfully no flooding here, but others weren’t so lucky. I spent most of the day with Loryan Strant via Lync Online running through some Azure scenarios which will be a topic for a future series of posts, but I thought I would share some of the ways to make working with Azure VMs easier.
When it comes to working with the RDP sessions into your VMs, you have several options available. First of all, you can use the Connect option from within the Azure Virtual Machines page. This option works, but defaults to full screen, which can make it less than user friendly when you are working with multiple VMs simultaneously.
The second option is to edit the connection properties within Remote Desktop Connection to a resolution smaller than your monitor’s resolution. This will allow you to organise your RDP session windows to your preferred style. You can also drop the colour depth and other elements of the user experience to improve performance if you are working over a slow connection.
The third and final option for this topic is to use Remote Desktop Connection Manager. RDCM allows you to group the Azure VMs into logical structures that make sense for the task at hand, and you can easily configure default settings to apply to the different levels. You will need to make sure you include the correct RDP port for each VM if they are coming out of a shared service in Azure, and that information is available within Azure or from the Remote Desktop Connection if you have already connected to the VMs.
The other thing to think about when you first start working with your Azure VMs is to create a base virtual machine where you install what you deem to be the necessary components for any server you plan to deploy – .Net Framework and PowerShell to name a few, and if you like to have systems as close to fully updated as possible when you deploy them, make sure you install what Windows Update has to offer. Once you are satisfied with everything that is installed you can run sysprep and choose to shut down the VM, at which point you can capture it.
Once you choose to capture it, you can assign a name to the VM that will be placed in your library, and the existing VM will be deleted.
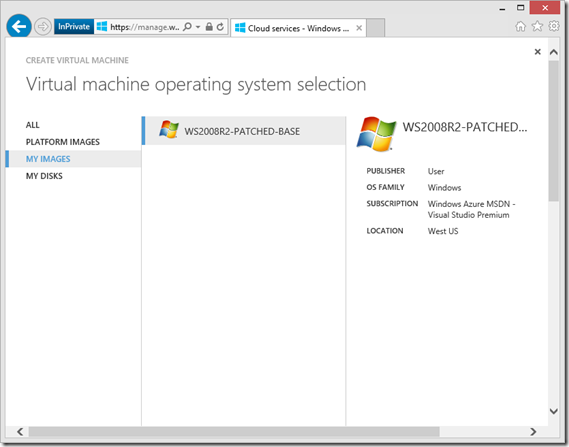
Once this is done, your VM will be available from the All section of Create Virtual Machine, as well as from My Images.
My images makes it clearer which VM to select if you are working from your own image that you have created.
There are other options such as creating a VM locally and then uploading it into Azure, but for those with limited upload speed as well as usage quotas on their internet connections, doing this creation inside of Azure is much faster. You do need to be aware that creating these VMs for future reuse will count against some of your data quota, so make sure you keep an eye on the billing section of Azure.


